
Monday, February 28, 2011
Tuesday, February 22, 2011
IRONMAN & BOBA FETT UPDATE

Well, the paint colors came out great!! I'm VERY pleased with the results! Again, the cans are in the garage and I don't want to run all the way back out there to write down the colors I used. They're rattle cans from Kragen Auto. But, I will! Note to self: List the cans of paint in the blog TOMORROW!!! :)
Anyway, here's the latest and then after a few hours near a heat source, the assembled helmet.
First up, I coated the Face Plate in another layer of Gold

Then, I decided to get brave and test out spraying the helmet after I masked off the chin area that I sprayed gold yesterday.

Followed by the rear Neck Plate


Then, two more coats on each and I was ready to let this one sit and dry near a heat source for a while.


After a couple of hours...WOO HOO!!! What a BEAUTY!


All that remains now is to do some very minor touch up work here and there from the masking, rubberize the interior and possibly pad a few spots, install the electronics for the eyes and get the magnets installed to secure the Face Plate and Neck Plate to the Helmet.
This one was very enjoyable to do! I may have to consider another one in the future! :)
I also sprayed the last and final coat of primer onto the Boba Fett helmet tonight. I think I've about worked out everything I can on this helmet without sanding portions all the way back down again. This mold was in REALLY bad shape when this helmet was pulled. But, it's looking pretty good now. Next up will be the planning stages for the battle damaged paint scheme from Empire Strikes Back. I believe it's about 6 layers of different colored paints with previous layers showing through here and there.


Good night all! :)
Monday, February 21, 2011
IRONMAN HELMET
Okay, so I know it's not my usual Star Wars stuff, but it's still REALLY cool and I had to put up some preliminary photos.
Last night, I was working on my Ironman Helmet and decided to tackle cutting out the eyes in the fiberglass. Well, it turned out great! (I didn't think to snap a photo though...DUH!)
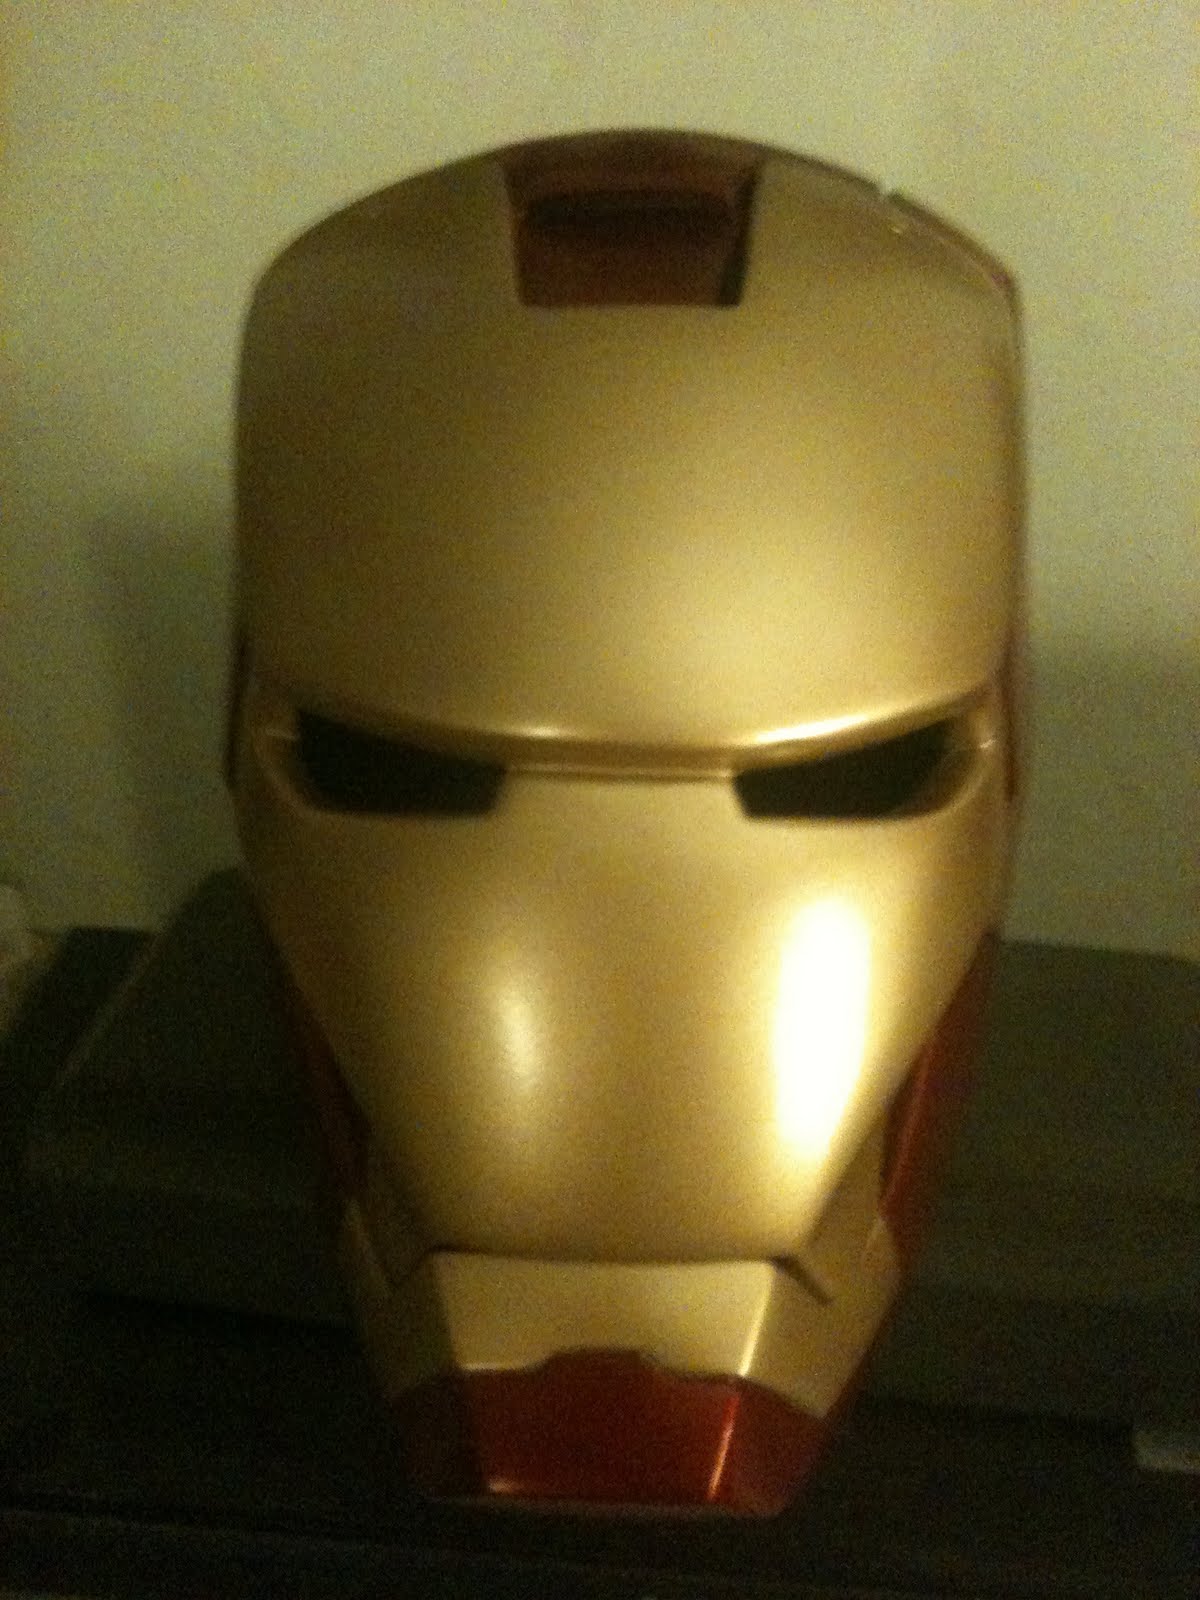
So, tonight, after doing some more sanding on the primer coat of Boba Fett and my Clone Pilot, I took a close look at Ironman and decided I could try painting the Face Plate and Chin area of the Stark Armor. I used some Metalic Gold I found at Kragen Auto, which I'll reference here tomorrow and shoot a photo of the can.
I'm VERY pleased with the results. This stuff goes on real thick though, so I had to stand back a bit and do three light coats.
First off, here again is the photo of the helmet BEFORE I cut they eyes out.

Now, a shot of the Face Plate after three light coats of the Gold Metalic from Kragen.


And lastly, the chin area of the main mask.

So, there ya have it! Ironman in the works! More to follow.
I'll keep updating this project along with all the others...to include more R2 coming soon! :)
Last night, I was working on my Ironman Helmet and decided to tackle cutting out the eyes in the fiberglass. Well, it turned out great! (I didn't think to snap a photo though...DUH!)
So, tonight, after doing some more sanding on the primer coat of Boba Fett and my Clone Pilot, I took a close look at Ironman and decided I could try painting the Face Plate and Chin area of the Stark Armor. I used some Metalic Gold I found at Kragen Auto, which I'll reference here tomorrow and shoot a photo of the can.
I'm VERY pleased with the results. This stuff goes on real thick though, so I had to stand back a bit and do three light coats.
First off, here again is the photo of the helmet BEFORE I cut they eyes out.

Now, a shot of the Face Plate after three light coats of the Gold Metalic from Kragen.


And lastly, the chin area of the main mask.

So, there ya have it! Ironman in the works! More to follow.
I'll keep updating this project along with all the others...to include more R2 coming soon! :)
Saturday, February 19, 2011
MORE HELMET PROGRESS
After working for about 6 hours today, I came home and went straight to my garage to paint some helmets. The rain here had stopped and the sun was out for a bit so I figured I'd take advantage of the moment.
Here's the shots of the Clone Pilot Helmet with two coats of primer on it. Most of the trouble areas from the mold look pretty good. There's still some fine grit sanding I want to do with mabye 2000 grit or so, but for now, it needs to sit in the garage and dry for at least 24 hours.

Episode II Clone Pilot Helmet Primered

Tough to see here but the reapaired ear area looks pretty good

The other side

The Back
Of all the weak areas on this primer coat, I'm going to say the back needs the most work. I'll hopefully be spending some more time on it this weekend.
Next up, the Boba Helmet. Now that I have a few coats of primer on it, I need to do some more work. I'm not happy with the repairs yet. I'll hit it with some 400 grit in the coming days and go to work on repairing more of the mandibles and the ear areas. But at least it's got a couple coats on it now.


I love the gray primer. It really helps the detail jump out. Maybe one of these days I'll do a CUSTOM armor of battle gray. Hmmmmm.......
Here's the shots of the Clone Pilot Helmet with two coats of primer on it. Most of the trouble areas from the mold look pretty good. There's still some fine grit sanding I want to do with mabye 2000 grit or so, but for now, it needs to sit in the garage and dry for at least 24 hours.


Of all the weak areas on this primer coat, I'm going to say the back needs the most work. I'll hopefully be spending some more time on it this weekend.
Next up, the Boba Helmet. Now that I have a few coats of primer on it, I need to do some more work. I'm not happy with the repairs yet. I'll hit it with some 400 grit in the coming days and go to work on repairing more of the mandibles and the ear areas. But at least it's got a couple coats on it now.


I love the gray primer. It really helps the detail jump out. Maybe one of these days I'll do a CUSTOM armor of battle gray. Hmmmmm.......
Friday, February 18, 2011
BOBA FETT HELMET UPDATE
I sanded smooth a lot of the bondo the other night. Here's some pics to show the end results. I'm much happier with the finish of the helmet now. I'll still work on a few minor trouble spots here and there, but I think this one is getting close to being ready for primer.


I also got quite a bit of work done on the Clone Pilot Helmet, but haven't had the chance to shoot any pics lately. My phone was on the charger the day I did all the work. I'll post up some pics of that progress this weekend.


I also got quite a bit of work done on the Clone Pilot Helmet, but haven't had the chance to shoot any pics lately. My phone was on the charger the day I did all the work. I'll post up some pics of that progress this weekend.
A NEW HELMET FOR THE COLLECTION

A primered and unfinished C3PO helmet by "Starbuckcylon".
Absolutely too small to be worn by myself or my 13 year old son...Anthony Daniels must have a REALLY small head!! Wow!
Anyway, this will have working light up eyes when I'm finished. Probably some audio clips too since it will be a display only.


Sunday, February 13, 2011
CLONE PILOT HELMET PROGRESS
It's Sunday, and I spent most my day at WORK!!! YUCK!!! So, when I got home, I needed to take my mind off crap. I went down to the garage and started working on the Boba and Pilot helmet. I made quite a bit of progress on Boba, but forgot to take the pics. Here's the pics from the Pilot.
The first five pictures below show the bottom of the helmet neck ring cut off. This is in preparation for the Magic Sculpt and magnetic attachment.


Next, I determined I wasn't pleased with the seam lines I'd sanded, so I went back in with some Bondo Glazing Putty and filled the trouble areas. Most of it will be sanded smooth in the next few days.


Afterwards, I placed the Magic Sculpt into the Neck Ring and Helmet Base to provide the foundation where the magnets will be embeded later.


I should probably mention here that I goofed up the neck ring pretty good. You'll see in this next photo that I had to rejoin the neck ring in two places where I cut it too short. Some super glue, some fiberglass resin and matting and a bunch of Bondo Glazing Putty and the Neck Ring is good as new.

I haven't put the magnets in yet, but as you can see, the ring fits up against the base of the helmet very well. A touch of sanding here and there and it should be nice and snug.

I'd also like to tell you about a tip I learned with Magic Sculpt. When I'm trying to marry up the two halves of the helmet (Neck Ring and Helmet) with the Magic Sculpt ledges, it's nice to get them kissing right up against each other. Well, when your working with the pliable state of Magic Sculpt, it will stick to itself and there was no way to press it up against itself and then pull it back apart. However, a buddy told me to lay saran wrap over the edges and it will allow you to get a nice tight fit without the sculpt sticking to itself...IT WORKED! Let it dry with the wrap in place. Once dry, pull the two pieces apart and you have a nice tight fit.
Next up, more sanding and then on to drilling the pilot holes for the magnets; followed by the primer coats of paint and plasti-dip coating on the inside.
Monday, February 7, 2011
CLONE PILOT & BOBA WORK
Made some more progress on the SGT FANG Boba Fett and Clone6 Episode II Clone Pilot Helmets last night and tonight. Here's a few pics to keep you updated:
First up is the SGT FANG Boba. There was quite a build-up of resin along the bottom edge of the left mandible. I sanded down what I could but it still wasn't looking right, so I've now gone in and filled that area with some bondo. Hopefully, I'll go back in and smooth it all out and get the "lump" fixed from the poor quality mold it was pulled from.

"Fixing Left Mandible"
The right side of the helmet also had a fair amount of pitting and damage to it which I've filled with bondo and will be sanding smooth this weekend.

"Right Side Ear Repairs"
Lastly, for the time being, the top of the helmet. When I coated the inside of the dome with fiberglass and resin, it got pretty hot while it was curing. This caused a pretty good crack in the resin on the top of the dome. A little bit of Bondo and she's good as new!

"Fixing Crack on Top of Dome"
Next up are the Clone Pilot cast repairs. Again, another bad pull but I knew what I was getting on this helmet. The SGT FANG Boba Helmet damage was unexpected. This Clone was anticipated work.
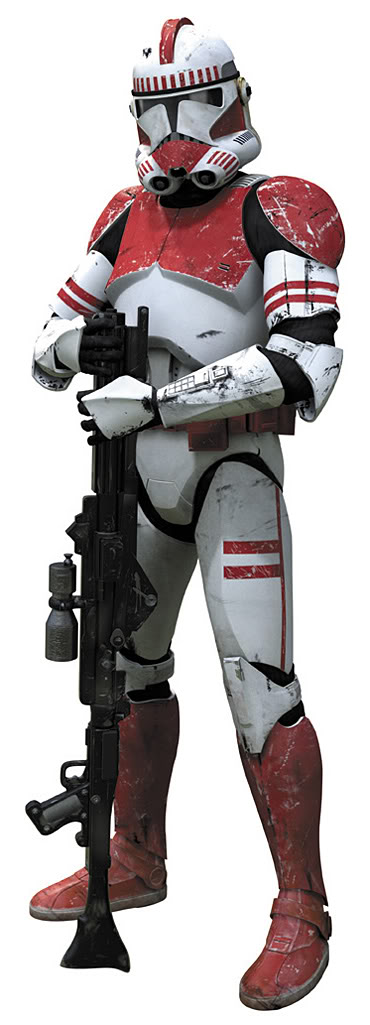
Again, this picture is of a friend's completed Clone Pilot, not mine. This is just a reference point for me.

"The Goal"
Here's a shot of the right side of the head, or the right ear, before I did anything to it. This was from the damaged mold allowing the resin to pour into the ripped and torn parts of the silicone negative. (The subsequent two shots are of the gradual repair so far) I had to reinforce the inside of the ear area with Magic Sculpt to give myself something to carve into.


Now,the left ear was even worse and all the detail had been lost, as you can see in the first and second photo. So, after backing it with more Magic Sculpt, I began carving into the resin and Magic Sculpt. Working slowly with my dremel tool will eventually get all this carved out. I'll be smoothing things out with sand paper and bondo once I get the shape cut in.


Next up were the rear seam lines. The two halves of the mold weren't quite lined up properly causing the right and left sides of the helmet to come together slightly lopsided. Once I get the seam sanded smooth, I'll probably go back in and build a few small areas back up with some more Magic Sculpt or Bondo.


Lastly, the beginning of reconstruction of the Chin Pocket and cutting out of the Visor area and Teeth. The Chin Pocket is going to take a fair amount of work to reconstruct. The visor and teeth area was pretty simple.


Until next update...
First up is the SGT FANG Boba. There was quite a build-up of resin along the bottom edge of the left mandible. I sanded down what I could but it still wasn't looking right, so I've now gone in and filled that area with some bondo. Hopefully, I'll go back in and smooth it all out and get the "lump" fixed from the poor quality mold it was pulled from.

The right side of the helmet also had a fair amount of pitting and damage to it which I've filled with bondo and will be sanding smooth this weekend.

Lastly, for the time being, the top of the helmet. When I coated the inside of the dome with fiberglass and resin, it got pretty hot while it was curing. This caused a pretty good crack in the resin on the top of the dome. A little bit of Bondo and she's good as new!

Next up are the Clone Pilot cast repairs. Again, another bad pull but I knew what I was getting on this helmet. The SGT FANG Boba Helmet damage was unexpected. This Clone was anticipated work.
Again, this picture is of a friend's completed Clone Pilot, not mine. This is just a reference point for me.

Here's a shot of the right side of the head, or the right ear, before I did anything to it. This was from the damaged mold allowing the resin to pour into the ripped and torn parts of the silicone negative. (The subsequent two shots are of the gradual repair so far) I had to reinforce the inside of the ear area with Magic Sculpt to give myself something to carve into.


Now,the left ear was even worse and all the detail had been lost, as you can see in the first and second photo. So, after backing it with more Magic Sculpt, I began carving into the resin and Magic Sculpt. Working slowly with my dremel tool will eventually get all this carved out. I'll be smoothing things out with sand paper and bondo once I get the shape cut in.


Next up were the rear seam lines. The two halves of the mold weren't quite lined up properly causing the right and left sides of the helmet to come together slightly lopsided. Once I get the seam sanded smooth, I'll probably go back in and build a few small areas back up with some more Magic Sculpt or Bondo.


Lastly, the beginning of reconstruction of the Chin Pocket and cutting out of the Visor area and Teeth. The Chin Pocket is going to take a fair amount of work to reconstruct. The visor and teeth area was pretty simple.


Until next update...
Subscribe to:
Posts (Atom)