Saturday, July 31, 2010

MORE LEG WORK & A NEW HELMET!

Got some more time in the garage tonight to cut out the Ankle Pieces and another 1/8" layer for the legs. So far so good! Not much to show as far as pictures. I'll try and get some photos of the leg stacks tomorrow.

I was also fortunate enough to have my Clone 6 Episode III Bucket dropped off today!!! Now I can make my Shock Trooper!!!


Just like the Episode II Grunt Bucket, this one is unfinished and will take quite a bit of work to make it presentable, but it'll be worth it.

THANKS DARREN!

Friday, July 30, 2010

LEGS TAKING SHAPE


After spending the time to cleanup my MDF leg template, I tackled my first set of leg layers. I'm REALLY pleased with how they came out!

I followed in the footsteps of Victor Franco and a few others before me, creating a good 1/4" MDF template. Once completed, I set up my flush trim router bit. I then used wood screws to attach the template to the surface of my wood blanks. I rough cut the shape with my jigsaw (to about 1/8" around the template) and then used the table router to trim the final edge.


Looking pretty good. I still need to go back and look at the plans and figure out what final cuts I need to make off these pieces, in addition to a few smaller 1/2" pieces and 1/4" pieces to finish off the bottom of the legs.

Tuesday, July 27, 2010

STARTED WORKING ON THE LEGS!!!


Tonight, I was able to take my printed leg templates and the 1/4" MDF I got from Home Depot and cut out my Leg Template. I think I'm going to make another one tomorrow just to see if I can improve on a few small errors. Otherwise, I think I'm ready to start cutting out the leg layers. I cut out the four pieces of 1/2" ply, along with the two pieces of 3/4" ply which will be used to cut the final layers.

Lastly, I hung the full-size leg prints on the shelf next to my work area in the garage...starting to look like a droid factory down there! Stay tooned!

Wednesday, July 21, 2010

MDF FOR LEG TEMPLATES

No pics to post, but a brief update. Stopped by and picked up my 1/4" MDF to make the leg templates with. Also, I went through my garage and found my Flush Trim Router Bit to follow the edges of the template with.

Right next to Home Depot was Hobby Town USA. I decided to stop in and start thinking about R/C Radios. When I first walked in, I was talking to them about the Futaba 6 Channel 2.4 GHz Spread Spectrum radio. There might be a few others that will work...I guess it all depends on what I want to spend. Most importantly, I want to stick with the 2.4 SS type radios. I foresee being in and out of there quite a bit over the coming months.

Lastly, tonight I finished cutting out the various holes in the inner dome. I think I'm getting fairly close to JB Welding the two domes together.

Tuesday, July 20, 2010

MOVIE SNEAK PEEKS

Look what I found out today!

Coming from Marvel Studios, July 2011. Need I say more?

CAPTAIN AMERICA

THOR


STEP #1 OF THE LEG BUILD


Like many builders, I'm trying to do as much as I can on my own. Purchasing the leg kit for $350.00 sounds exciting because they are CNC cut wood, however, I'm going to tackle them on my own.

Tonight, I downloaded the Leg & Ankle PDF from the Yahoo Group Files and took them over to Kinkos. They printed them out at 100% and I checked the scale in the corner with a ruler...perfect!

In these photos, I placed a Quarter onto the large sheet to give you some idea of the scale.


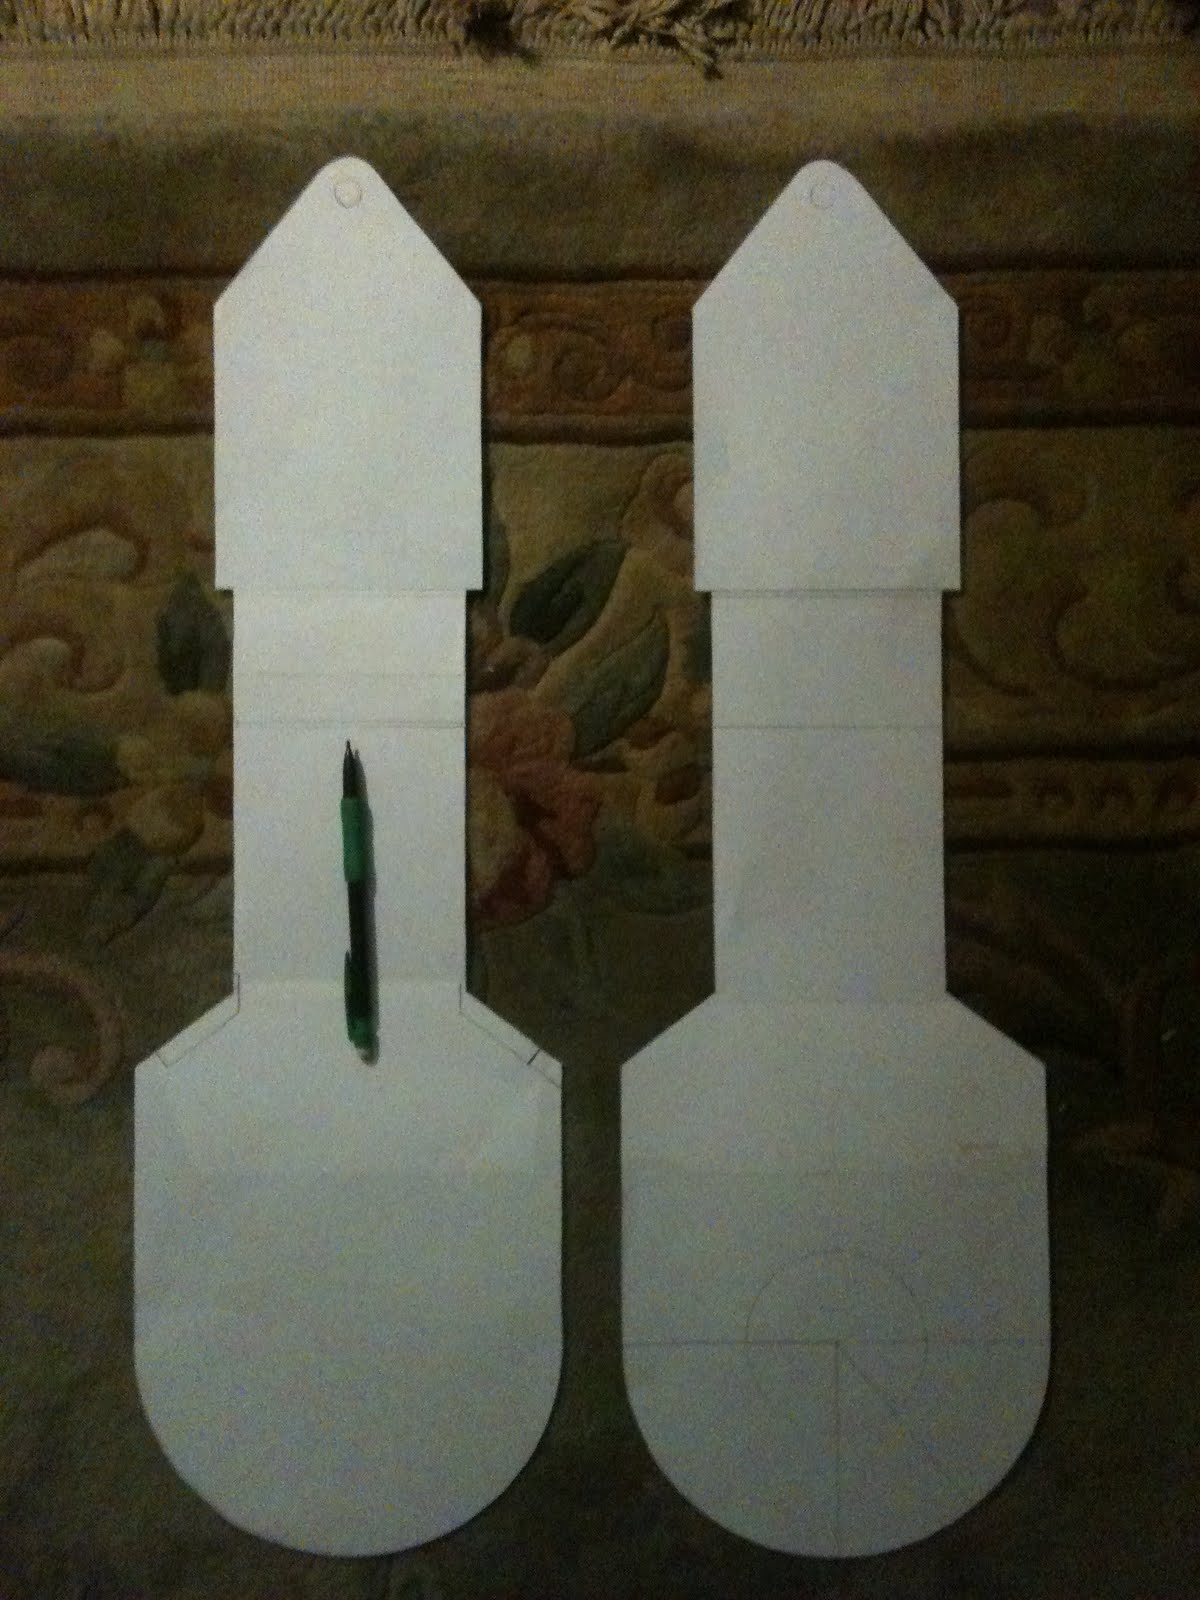
I then took the large print home and traced it with 8.5x11 sheets of paper, taping them together. This allowed me to keep the Kinkos print in tact for future reference. I'll use the taped ones to make a template and then use the template to cut the wood.

Here's the paper templates I made.(Mechanical Pencil shown for size reference)


Because the PDF dimensions were so large, Kinkos split it into two sheets for me. Total cost, $18.00 for the two large prints.

Next up, a sheet of MDF which will be used to cut the hard templates.

Saturday, July 17, 2010

MORE DOME WORK AND DETAILS


Tonight, I burned up my Dremel Tool while cutting out the inner dome holes to match up with the outer dome. Not a horrible big deal because it was old and I have another one...still ticked me off though. Not finished cutting all the inner dome holes, but I have only two more to go.


I also assembled the Resin Holo Projectors from Resinparts and installed the lenses. They look pretty cool considering they're not Aluminum.


I checked on the paint job from the dome ring I painted last night and it looks smooth as glass. Probably the best paint job I've done on the droid so far. I'm learning alot as I go and hopefully I'll be able to build a second droid one of these days.

Lastly, I glued in the dark lens for the Radar Eye on the front of R2...probably one of his more recognizable features. This pic was blurry...sorry...guess my hand moved.

Well, that's it for tonight, more cutting tomorrow night.

Friday, July 16, 2010

MORE PANELS PAINTED


The Pie Panels I painted last night came out pretty good and I couldn't resist gently setting them up on the dome to get a sneak peek! VERY VERY COOL!

So, tonight, I took out the rest of the panels from the Outer Dome and started painting them, along with the extra Aluminum Ring (Not Pictured) from the bottom of the outer dome.


It's all sitting in the garage drying. Tomorrow, I need to drill a few holes in the inner dome (large 2.5 inch ones) for the PSI lights and cut a few rectangles for the front and rear logic displays.

Thursday, July 15, 2010

OUTER DOME PIE PANELS PAINTED


Completed the painting process for the outer dome panels tonight. Eleven coats of paint later and they are sitting to dry for the next week.

Three coats of self etching primer, 3 coats of Cobalt Blue, 3 coats of Anodized Blue and 2 coats of Crystal Clear.

Wednesday, July 14, 2010

INNER DOME PIE PANELS


Tonight, I was able to complete the cutting of the upper pie panels on the inner dome. I also started rough sanding the surfaces to clean up some of the edges.

After the cutting was completed, I placed the two domes together and placed the outer dome pie panels in their placed just to see how things were coming together.


WOO HOO! Looks good! I then placed the upper dome topper and center dome pieces in place. Now, I need to go look at some more pictures and think about tomorrow's work...probably a LOT of sanding to do tomorrow.

Tuesday, July 13, 2010

MORE INNER DOME WORK


Two more inner dome pie panels cut out tonight! Woo hoo!!!! Wow, burning through the reinforced cut off wheels for my dremel like water!

Monday, July 12, 2010

INNER DOME WORK


Tonight, I had about an hour and a half to spend working on the Aluminum Dome. So, I started deburring the edges of the outer dome and cleaning up all the removed panels. This should allow me to apply Self Etching Primer pretty soon.

I then marked out all the inner dome panel lines and cut out the first panel...talk about nerve wracking!! The first panel is removed and all I have to do now is clean up the edges. This should work out okay if I take my time. But I'm REALLY burning through the reinforced cutting wheels on my dremel!! It took 4 discs just to cut this one panel out!

Slow going, but I want it to be done correctly!

I also had a chance to apply Flat Black to my E11 Blaster Build tonight. I'm SO much happier with the finish and plan on applying the weathering pretty soon.

Wednesday, July 7, 2010

R2 BLOG UPDATE FROM VACATION

The family and I are on vacation in Southern California this week. Had to find a quick post to update my blog with...and to keep it R2 related...here ya go!

It's R2's footprints, alongside 3PO in front of the Mann's Chinese Theater in Hollywood from August 3rd of 1977!!!